,

Share one USB printer with more than one PC

Share one USB printer with more than one PC

Share one USB printer with more than one PC
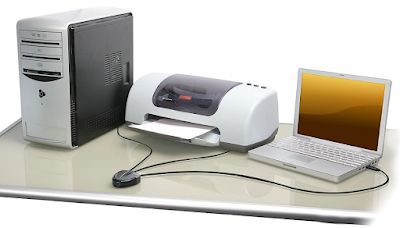
Share a printer easily!
What if you could share a printer with multiple computers instead of getting up to change your USB cable connection every time? Now you can. Share one printer between two or more computers by sharing the USB cable instead of switching it every time you need to print something. There’s a nifty device called a USB Printer Automatic Sharing Switch that makes it possible to connect a single printer to two or more computers without ever having to switch the cable every time.

This device monitors the USB connections from all the connected computers, and when it detects that one of them is sending a print job to the printer it automatically connects that computer to the printer.

Share one USB printer with more than one PC
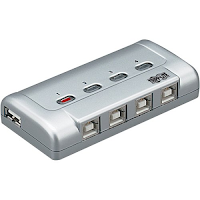
There is a choice of 2-port and 4-port models depending on how many computers you have to connect to the printer.


Share one USB printer with more than one PCInstallation is very simple as these devices are Plug and Play types that do not require additional skills. You need to plug the computers and the printer into the switch box and then install the software on each of the computers. 

And the good news is that you can get a 2-port switch for as less  as $20! Just one thing to remember is that some models have switches that need to be manually turned on or off in order to make the connection to the specific computer you want to print from. 

However there are automatic models that you can choose and they come with an automatic switch. The difference in price is very less, but the ease of use and time saved is huge.

Click here to look at some the great selection of USB Printer Auto Sharing Switches at Amazon.com


Note: The links in this post are affiliate links.
, ,

How to block any website on Windows PC

How to block any website on Windows PC

The other day I received a mail from my reader Venugopal, asking me to help out with a peculiar problem - how to block a website on Windows PC so that no one could access it without his permission? You see he had saved all his passwords in his browser and someone in his family had used his PayPal credentials to pay up for a product in an online purchase. Seeing that it was done for a children's product he guessed that it was done by his teen kid who wanted to buy something which would have 'officially' not been approved. So he wants to know if the PayPal site can be blocked in that PC thereby avoiding a conflict.

Here is my reply to him:  Yes, Venu, fortunately there is a way to do it and it is very simple. And it has to do with adding a single line to a Windows file named Hosts.

Here’s how to do it:


  1. Log in to Windows using your Administrator account that has Administrator privileges. Usually the one you boot into Windows is an Administrator account by default. I'll tell you why this is important in point number 7 below.
  2. Open Windows Explorer and go to C:\Windows\System32\drivers\etc. then double-click the Hosts file. Select Notepad as the program to open it with.  
  3. Make a backup of the Hosts file before doing anything else (just in case anything goes wrong) by copying the contents of that file in a new notepad file and saving it in your regular place like 'My Documents' or 'Desktop'.
  4. Now in that Hosts file in notepad, go to the end of the very last line in the file, then press the Enter key to create a new line.
  5. Type 127.0.0.1 then press the space bar. Now type the URL of the website you wish to block (in this case www.PayPal.com). 
  6. Here, you could repeat steps 4 and 5 in order to block other websites in addition to www.PayPal.com. 
  7. Click File > Save as, then click the Save button to save the modified hosts file. Here if you are not an Administrator, you will not be able to save it as it is a system file.
  8. Restart your PC, then check to see if your can get to the www.PayPal.com website. If all steps were done correctly, you won’t be able to access it with any web browser.
Here’s a screenshot:


Note: This tip will work for Windows XP, Vista and Windows 8 as well. 

I suggest you might to consider placing a password on your Administrator account as otherwise anyone can simply undo the block from the Hosts file with a simple Google search. If you password protect your PC, no one will be able to alter the Hosts file to remove the line(s) you added.